
Starlink Rental Kit: How to Setup Your Device

Find A Clear View of the Sky
Your Starlink needs a clear view of the sky so it can stay connected with satellites as they move overhead. Objects that obstruct the connection between your Starlink and the satellite, such as a tree branch, pole, or roof, will cause service interruptions.

Plug Starlink In
Put Starlink into base and plug into power.

Starlink will automatically level itself to search for satellites overhead. Do NOT attempt to manually adjust your Starlink.
After a few minutes, Starlink will make an initial connection to the Starlink constellation and tilt to the optimum angle for satellite coverage (slightly north or south based on your location in the northern or southern hemisphere).

Connect to WiFi
On your device, find and connect to the BORROWSTARLINK### network in your WiFi settings.
The ### will match the Starlink number you received
Enter the password found inside the case
You are now connected! Open the Starlink App to see additional settings, check your connection and more.

Kit Repacking
In the Starlink App, Select Setting -> Starlink
Slide the "STOW" Slider. This will collapse the Starlink Antenna to its shipping orientation.
Gently replace all hardware into the provided shipping case
You can now drop off your kit at any UPS Store!

If you cannot access your starlink via the app to Stow it. Please follow these steps.
- Remove power from the Starlink
- Remove antenna from stand
- Place antenna face down
- Re-apply power to Starlink
After a couple minutes, the Antenna will default to its stowed position
Can’t Get Online?
Open the Starlink App to check for any alerts, outages, or obstructions.
Check the WiFi router light.
Make sure everything is securely plugged in and there is no damage to hardware or cables.
Confirm you are at the correct service address listed on your account.
Power cycle Starlink by unplugging from power and then plugging back in.

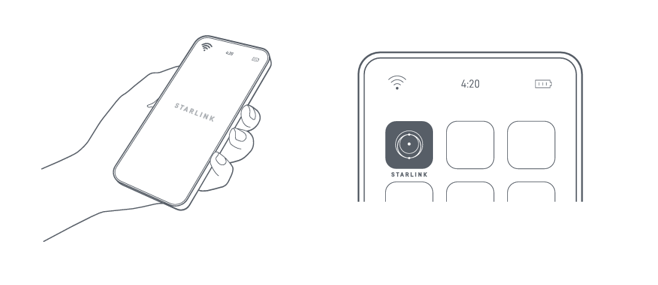
1 | Download the Starlink App
Scan the QR code to download the Starlink App.
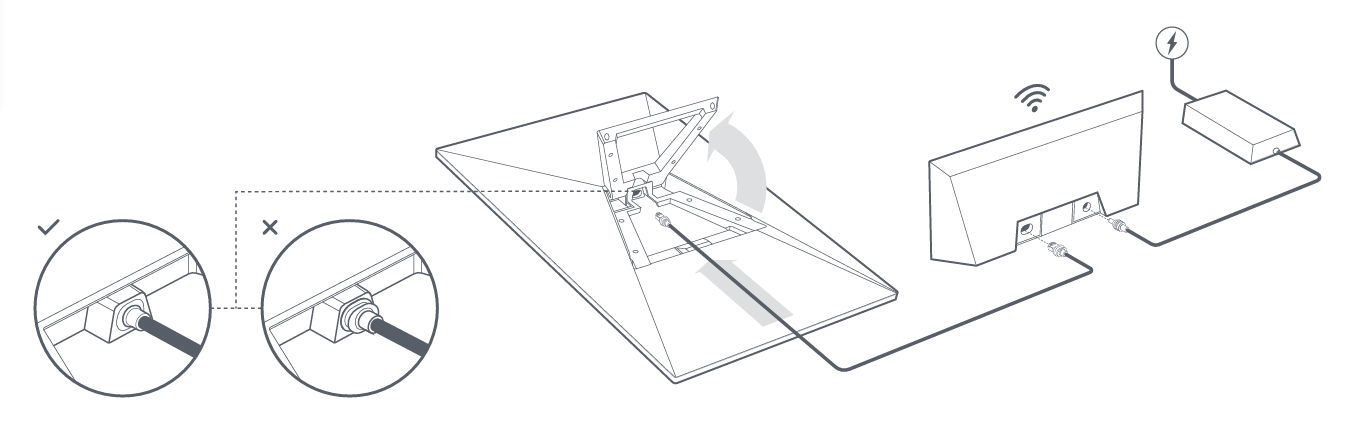
2 | Install the Cables
Lift the kickstand and plug one end of the provided cables into your Starlink with the cable locking feature facing up. Ensure the plug is fully inserted such that the plug face is flush with the surface. To remove cable, pull firmly outward as there is no release tab.
Route the other end of the Starlink cable to your Router and plug it into the port number 1 indicated with the antenna symbol on the back of the router.
Plug the Gen 3 Router into a power outlet using the power cable and power supply.
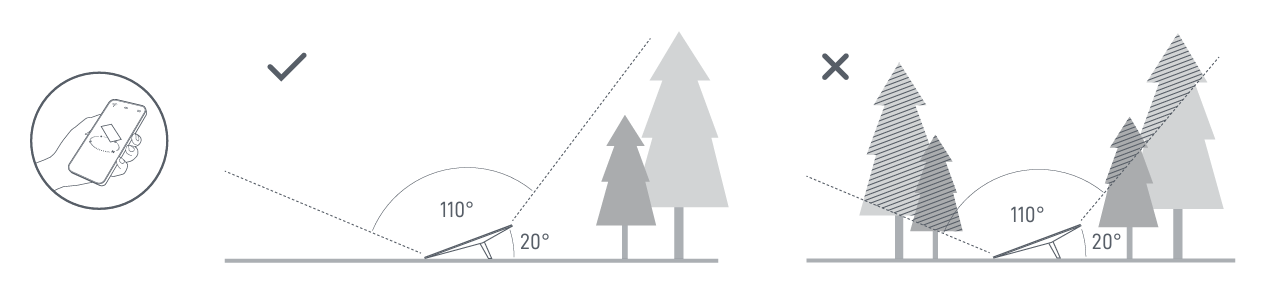
3 | Find A Clear View of the Sky
Your Starlink needs a clear view of the sky so it can stay connected with satellites as they move overhead. Objects that obstruct the connection between your Starlink and the satellite, such as a tree branch, pole, or roof, will cause service interruptions. Use the obstruction tool in the App to ensure you have selected a suitable mounting location.
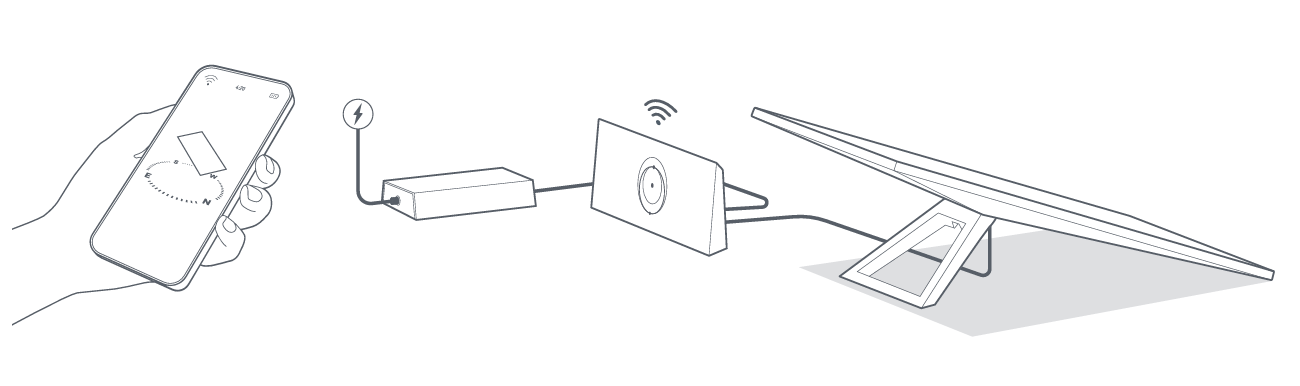
4 | Connect and Align Starlink
Step through the Starlink install process on the Starlink App. Once connected, an alert on the App will show if you need to rotate Starlink to be properly aligned. Click the alert to use the alignment tool.
5 | Connect to WiFi
- On your device, find and connect to the STARLINK network in your WiFi settings.
- Once connected, a browser window will open prompting you to enter a new SSID (Network name) and password. This step is optional but recommended.
- You are now connected! Open the Starlink App to customize additional settings, check your connection, and more.
Can’t Get Online?
- Open the Starlink App to check for any alerts, outages, or obstructions.
- Check the WiFi router light.
Flashing White Light----Trying to connect. The light will turn solid white when setup is complete and the router is connected to the internet, or solid red if the router cannot get a connection to the internet in 20 minutes.
Solid White Light--------Connected to internet. Will turn off after 1 hour.
No Light-------------------No power to router. With good connection, the light will turn off after 1 hour.
Red Light-----------------Not connected to the internet.
Violet Light---------------Router is in bypass mode. Will turn off after 1 hour. Factory reset required to exit bypass mode.

- Make sure everything is securely plugged in and there is no damage to hardware or cables.
- Power cycle the router by unplugging from power and then plugging back in.